

1.Download Authenticator App
- Before we start, download Authenticator App by searching for it in your Apple device’s App Store.

2.Locate 2FA Settings
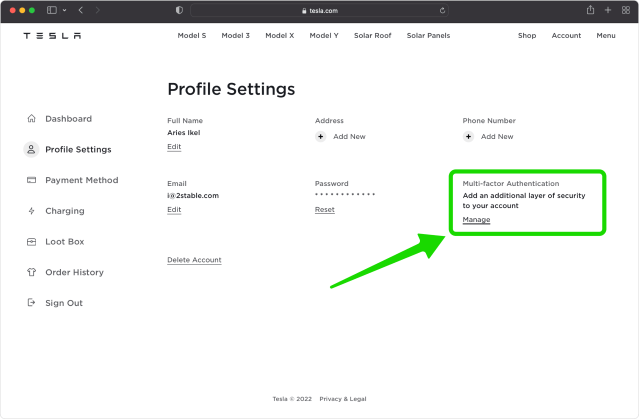
- Log in your Tesla account and click on Profile Settings.

3.Set up Multi-Factor Authentication
- Look for Multi-factor Authentication option and click on Manage.
4.Next Page
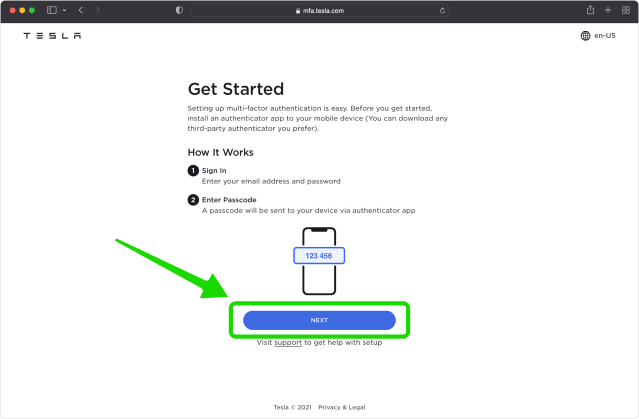
- This is an informational page only. Click NEXT when you’re ready to start.
5.Verify Tesla Account Password
- Enter your Tesla account password and click SIGN IN

6.Set up Multi-Factor Authentication
- In this step is shown the QR Code that contains the secret key which you need to scan with Authenticator App. Keep this page open as you reach for your device, iPhone, iPad or iPod.
Note: Do not scan the demo image shown below.
7.Capture QR Code
- Open Authenticator App, tap the plus
 button, and hold your device up to the computer screen to scan the QR Code. You can also enter the 2FA key into your authenticator app manually if you prefer.
8.Two-Factor Authentication Code (2FA)
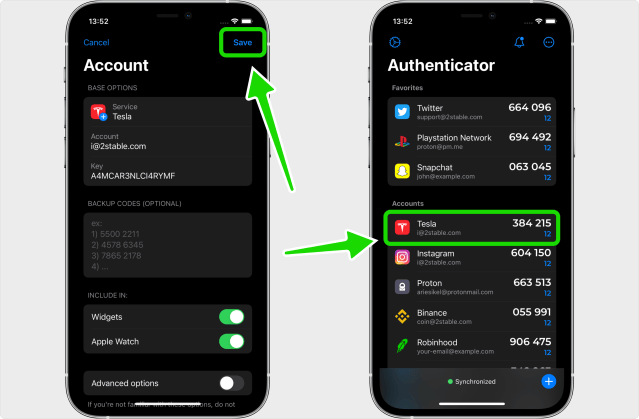
- After successfully scanning the QR Code, Authenticator App will automatically choose the Tesla logo and autofill the account name and secret key. Click on Save when ready.
9.Verify Your 2FA Code
- Once your Tesla account has been successfully added to the Authenticator App, type the 6-digit code on the Tesla website in the Passcode field and click SUBMIT

10.Save Recovery Codes
- Your Tesla account is now protected with two-factor authentication. You can copy the Backup Passcodes into Authenticator App or save them in a secure place. Press on DONE and that’s all.

Great job! Your Tesla account is now fortified with Two-Factor Authentication (2FA), putting an extra layer of security in place. For any queries or support, feel free to check out the Tesla support page. Drive safely and enjoy the peace of mind that comes with enhanced account protection!
You must be logged in to post a comment.